Last updated on June 26th, 2022 at 11:41 am
In this tutorial I’m going to show you how to move your website from one domain to another. In other words, I’m going to show you how to transfer a WordPress site to a new host and how to change its domain name.
By migrating your WordPress site, the only thing that’s going to change is the domain name.
All of your contents will be the same, including your:
- WordPress settings
- Plugins and Themes
- Schemes will be the same
- Permalinks
We’re just going to move the site. And we’re going to this manually. We’re NOT going to use a plugin. I have another tutorial where it shows you how to do this with the help of a plugin.
But by doing it manually, you really understand what’s going on with your WordPress site and you get more of an insight of how this stuff works.
Prepare Your Site for the Transfer
So, the first thing we have to do is we have to prepare our site for the transfer. We’re going to backup all the files and we’re going to export our database.
And then step two, we’re going to put all those things onto the new server with a new domain name on a new hosting account.
Let’s get started!
We have this site right here.
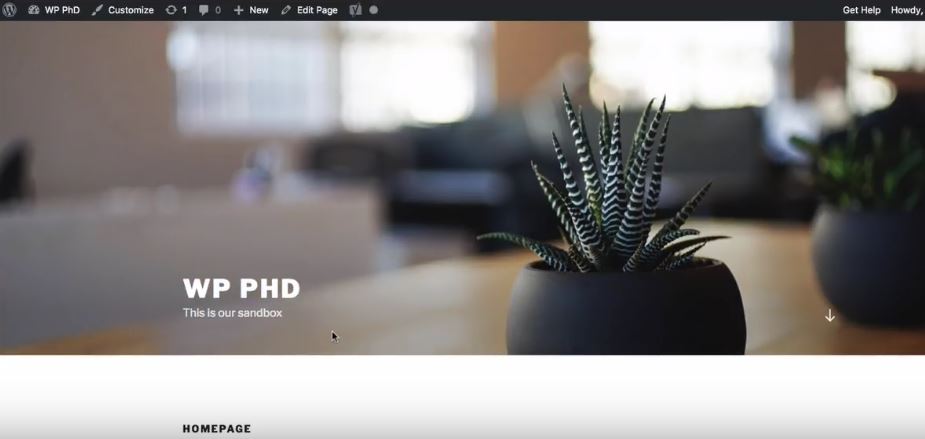
This is the one I’m going to transfer. It’s my mysite.com demo site and I just have I don’t have a lot customizers really. I have the title here, this is our sandbox for the tagline and this is about it. And we’re going to put it on this domain called yoursite.com, just a random domain.
I’m just refreshing the page so you can see that there’s nothing here besides the domain name and the text. This is ‘Craft in color’.
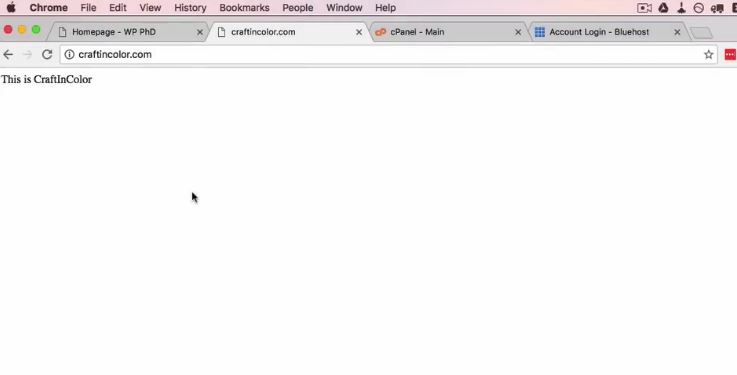
In a few minutes it’s going to look like this as we transfer our entire site to this domain.

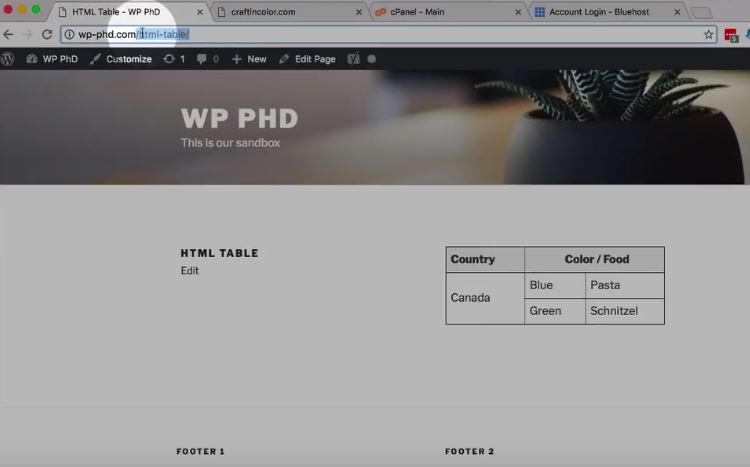
And we even have a few pages of content that I’ll show you. So you can see that the content will be transferred and the permalinks will be maintained. So if we go to any one these pages like be HTML page we have this URL and this content here we’re going to see that this URL stays the same. The permalink stays the same.
The only thing it changes is the domain name. You’re going to see it in a few minutes.
So, let’s get started.
Backup Your WordPress Files
First thing that I do is back up all the files of the site that I’m going to transfer.
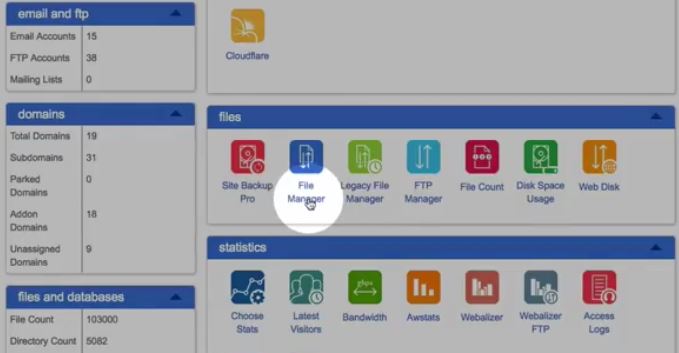
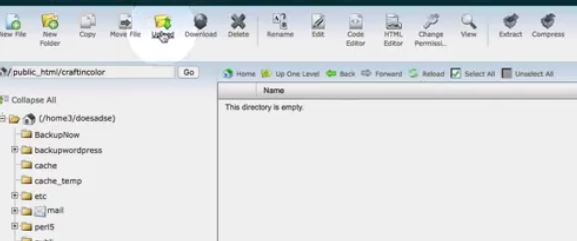
I do this usually in the File Manager.
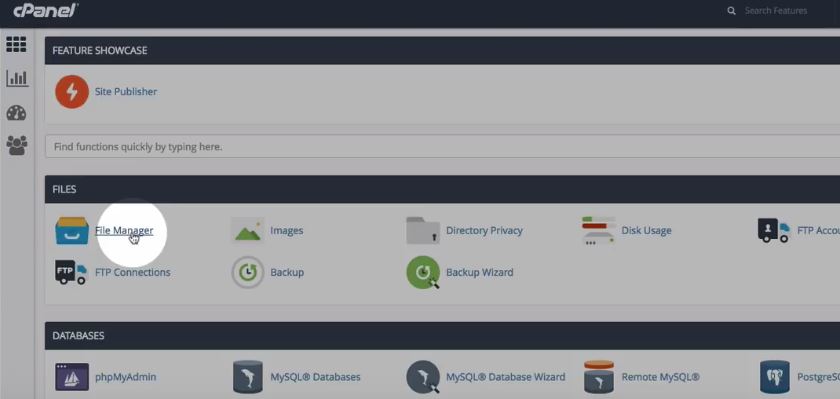
FTP takes too long to download them all. So, I usually go into my File Manager, I find the root installation folder for the site and I select all the actual WordPress files and then I click on Compress.
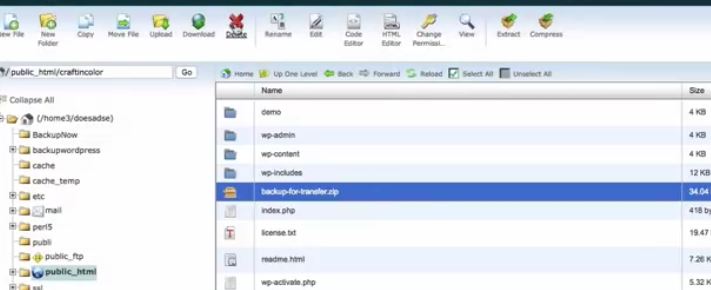
I choose zip and then I click on compress files. First, I’m going to choose a name for the archive. I’m going to call it backup-for-transfer.zip and then click on Compress Files.

This usually takes a few minutes. If your site has a lot of content, it will take a lot longer and once that’s done, I’m going to download that zip file.
Once done, click on Close and then we have this file right here.
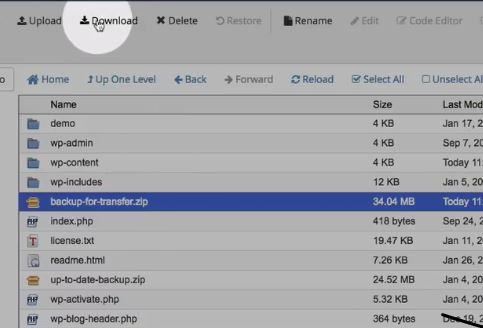
I’m going to click on this Download button to download that file.
Now this file, it says down here it’s 34 MB. If it’s bigger than 2 GB, you better not use the upload feature in the File Manager.
If your site takes more than 2 GB you’re going to have to use FTP to upload that to your new server. We’ll talk about that more in a minute.
Now that we have this file or this zip file that contains all the site files, we need to get the database.
Backup Your WordPress Database
So we go back into the cPanel area. We want to go to phpMyAdmin.
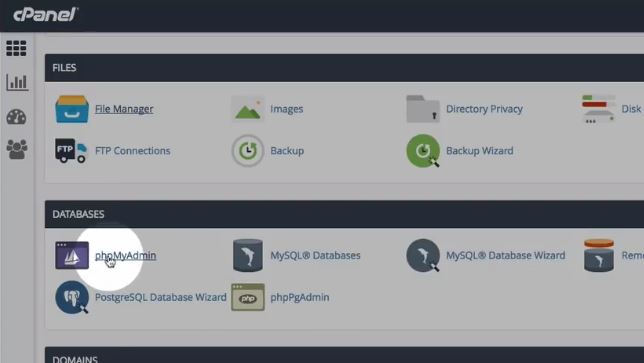
And this is where all the databases that are in your hosting account are listed.
If you have more than one database, you want to make sure you’re using the right WordPress database.
How to determine which is the correct database name for your WordPress site?
The way to find out which WordPress database you need is the following.
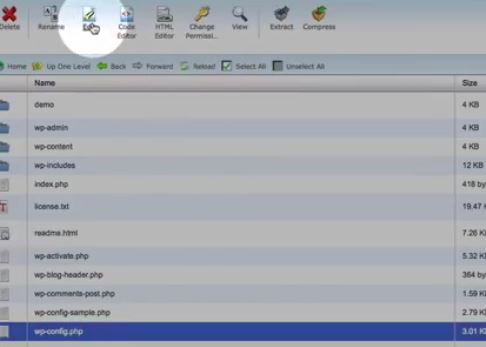
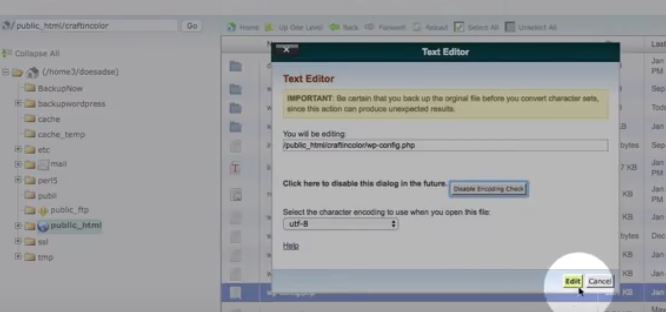
Go back into your File Manager.
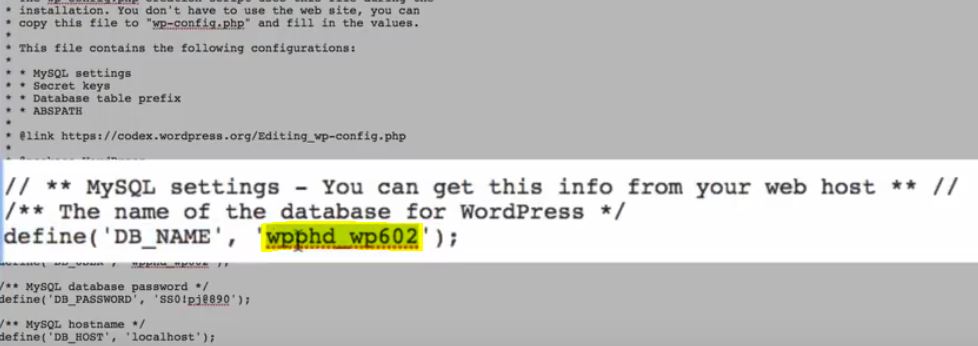
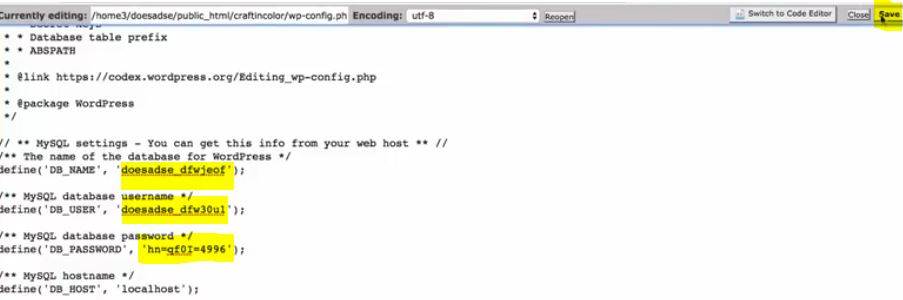
Open the wp-config.php file by clicking on it and then clicking on Edit or Code Edit.
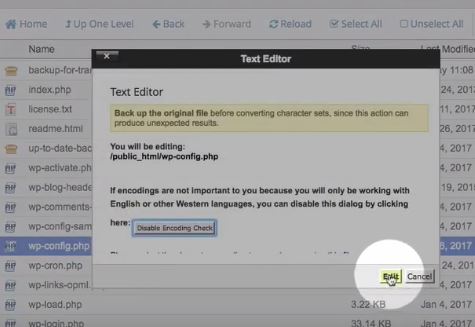
And this database name entry right here tells us what the name of the database is which is right here what I’ve highlighted.
In my case it is only one on the server anyway, so they really matter if you have more than one. That’s how you find the right database.
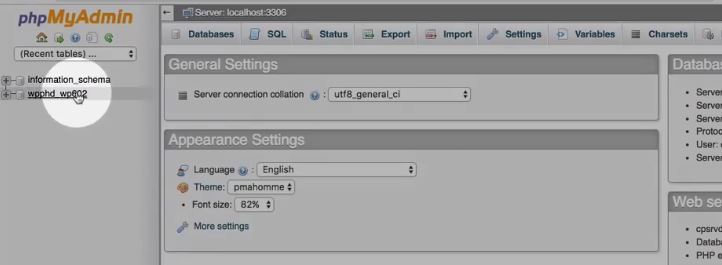
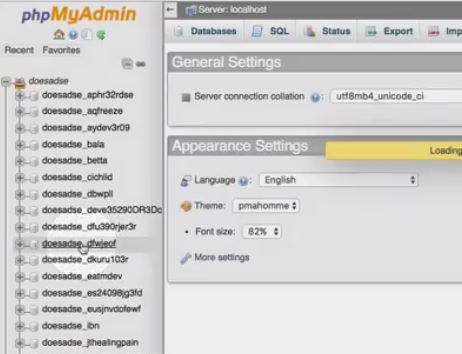
So, I just want to click on that database to open it and here we have all of the contents of that database.
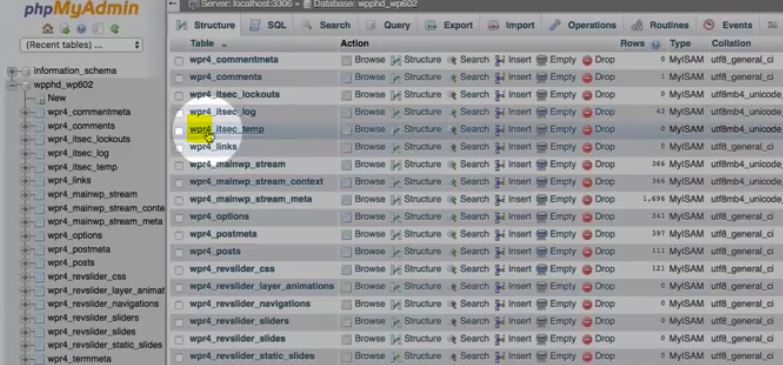
Now make note of wpr4_ as the prefix for this database. Yours will be different than that, but you want to make note of what your database prefix is.
What is WordPress Database Prefix?
The database prefix is the first thing before the first underscore or, by default, it’s going to be WP underscore (wp_). But if it’s not the default value, we’re going to have to make note of this to make this transfer work properly. And we’ll get back to that as well in a minute.
Export your WordPress Database
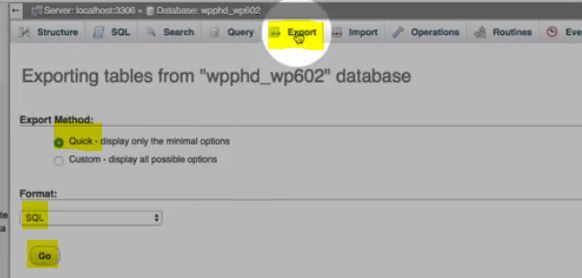
Next thing we want to do is export this whole database.
If we go to the Export tab we just use the Quick and SQL option and export the whole thing and this is our database file.
So, we have down here our backup-for-transfer.zip and our database backed up. So, we have a full backup of our entire site right now.
Log in to the Hosting Account that You Want to Transfer Your Site to
Now we want to go into the hosting account for the place we’re transferring it to.
And I’m also going to go to Bluehost which we see here.
The other one is InMotion Hosting.
So they’re two different servers, two different hosts. And what I’ve done already, as you can tell because this domain name is live is I’ve added this domain name to my Bluehost account.
If you need to add an addon domain to your hosting account, you can use this tutorial that shows you how to do that. So, you want to make sure your domain is active on the new host before you do this transfer.
Once we’re in here what we have to do is just, like before, find the File Manager which is right here in this case.
I’m just going to open the home directory and then we need to find the folder of the website we’re uploading to.
So, we’re uploading to craftincolor-dot-com in this demo. And there’s a folder in the public_html folder.
Right here we’re going to open that and delete this index file and make sure there’s no files presence in this root directory because we’re going to upload our other files, the ones we just downloaded.

So if I click on Upload.
And click on Choose File button, it’s going to be my Downloads folder. Click on Open to start uploading it.
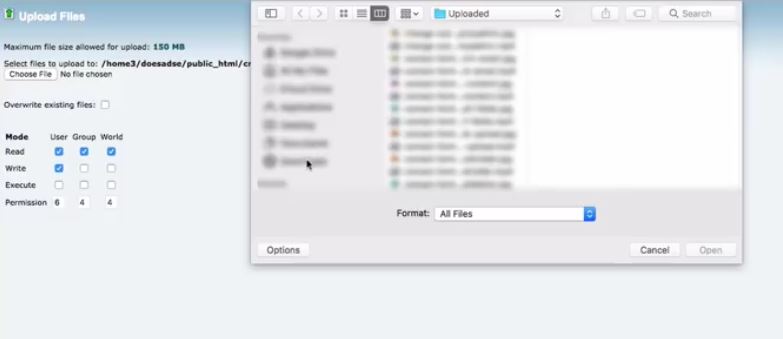
We’ve got a progress bar in the bottom right which tells us how far along we are. And again, this will only work if you’re uploading less than 2 GB. If you’re uploading more than 2 GB, you’re going to have to use an FTP client to upload. And it goes pretty quickly in this case because it is a small file size.
Upload is done and we can close this tab.
Click on Reload in File Manager.
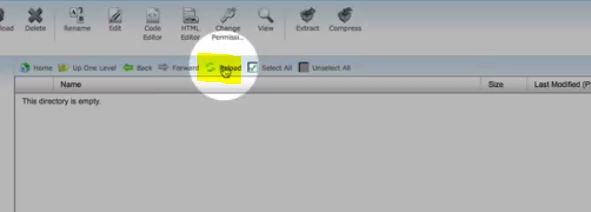
We have our uploaded files here.
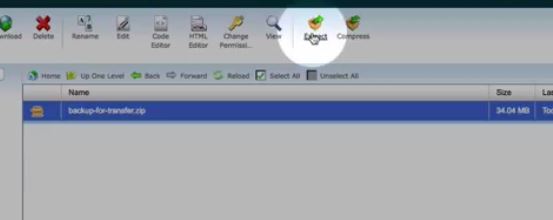
We click on it. Then click on Extract.
It will extract all those files right into this directory. Click on Close when the extraction is done. Click on Reload again.
And we can Delete this zip file that contained all the files.
Now we have our content all there. What we have to do now is if we open that wp-config.php file.
We will see that this the wpphd_ database name.

It is part of my previous hosting account. This is going to be different in the new hosting account.
So we can’t use these same database credentials.
We have to make a new database and then import our old database into that new one.
So, we go head back to our cPanel here and we find the MySQL Databases.
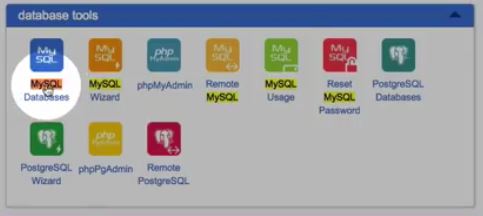
Click on that icon to open them so we can create a new database. And we want to make note of these credentials that we create.
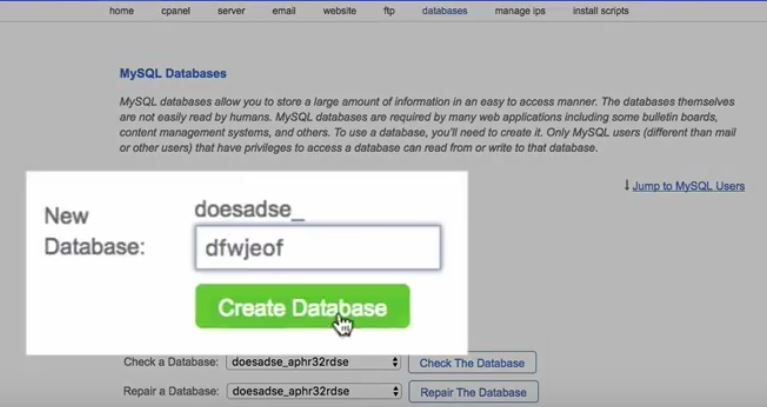
I’m going to call this random characters starting with dfw. I do now have my username and my database start with the same three characters. So we’re creating your database called dfw.
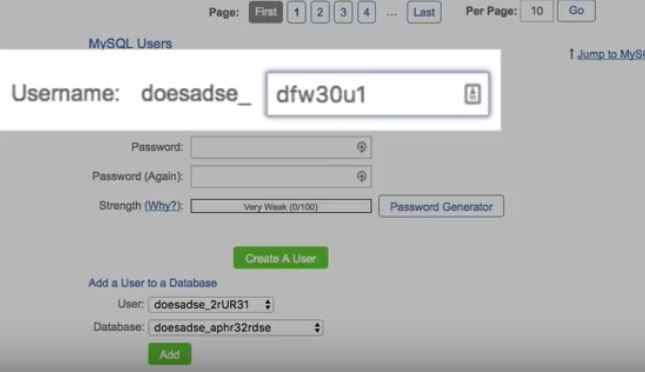
We scroll down and create a new user that starts with a dfw and a bunch of other characters.
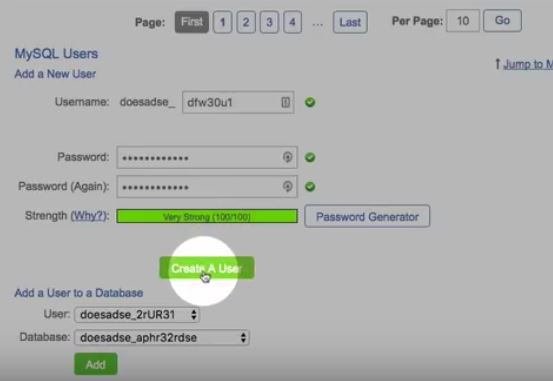
I usually generate a password. That one looks great. Check this box, otherwise you can’t click on Use Password.
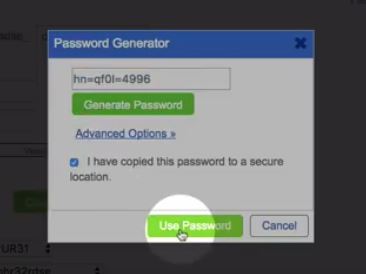
And then we Create A User and we successfully created the user for that account.
And now I just want to make a note of all the stuff we made.
So, our database name, which I should have copied earlier but it didn’t, database user name and user name password. And if we go back we’re going to find the database name which started with dfw. And this is the database name.
Link the User to the Database
And now the last step we have to do is link the user to the database. So, if we scroll right to the bottom of this page, we have this Add a User to a Database section. I want to find the ones that have dfw in the front for both of them.
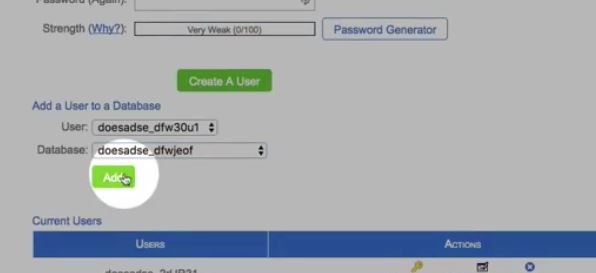
This is why I have the same three random characters at the beginning. It makes it much easier to find when I’m linking them because I have a lot of sites on this server.
And you can choose All Privileges, then click on Make Changes.

And we’ve successfully added that user to that database. That’s great.
Click on Go Back.
Now if I head back to this wp-config.php file – this is in our new host with a new domain.
We open the old wp-config file and we have to replace all these credentials with the new ones.
So I’m just going to copy each one of these and paste them over what’s there.

Copy this one and the password.
All right. Now those are in there. We can click on Save.
We have a database, but we just created that in the MySQL Database creator. So it’s a completely blank database right now. What we need to do is import the database that we exported earlier.
Import the Database the we exported earlier
So really the only reason we went through all that was just to have a database created and now we’re going to go and delete that database or delete the contents of it. We’re going to keep the database, but to leave the content.
So for that we want to go into the phpMyAdmin.
Here we have our list of databases which is quite extensive. And the dfw is the one we just created.
Click on that to open it. As we can see there are no tables found.
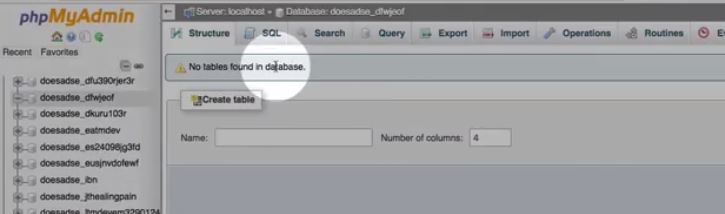
If there were tables here, we would delete them and then what we want to do is import using the Import tab.
I want to import the SQL database that we exported which in my case is this one right here.
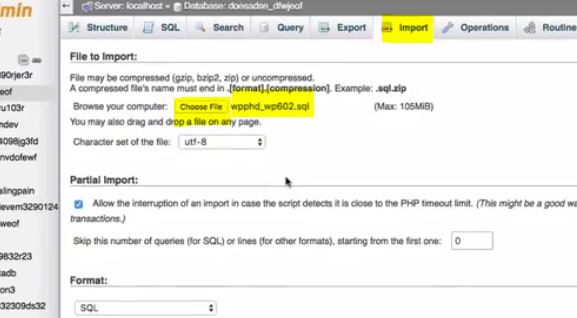
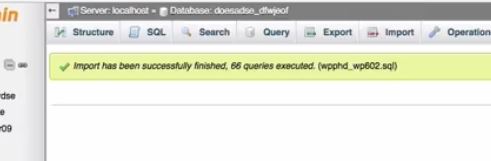
Click on Open. Then click on Go at the bottom and then we wait. Sometimes you don’t wait too long like this time here. Import was successfully finished. That’s great!
If we click on the Structure tab, we now see our database just as it was on the other site. You’ll notice again the table prefix, very important, wpr4_. That may not work for you. Depending on how you ended up transferring your wp-config file, if we go back into the wp-config.php file, you want to make sure that the table prefix right here is set to the same value that it is set in the phpMyAdmin.
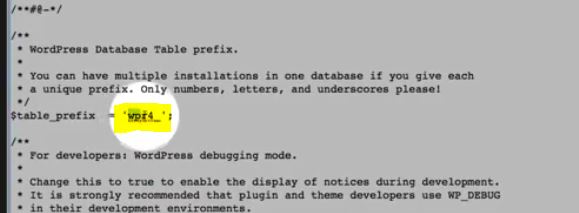
So this is wpr4_ and then the table names.
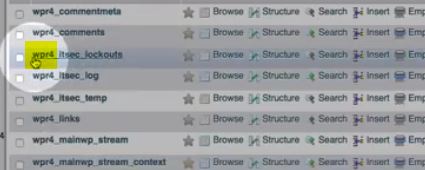
You want to make sure that this too is wpr4_ so it has to be the same.

Otherwise this is just not going to work.
Configure siteurl and home in the Options table
There’s one last very important thing that we have to do. And that is find the Options table.
Right here the wp_options table.
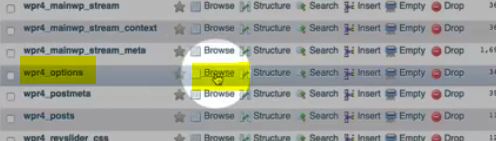
Click on Browse. When this opens, you will see that there are two entries called siteurl and home. And those are set to the previous domain name.
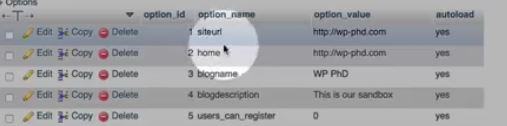
The siteurl and home options have to be changed to the new domain name. And we do that by double clicking on it and just changing to the new domain name and then copy that whole thing and we’ll click on the next one and paste it in there again.
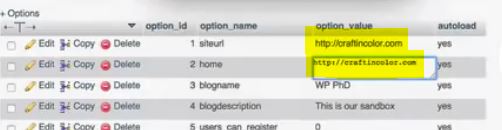
So now we have the site URL and the home URL updated. Now if we go back to our tab or go back to the site everything went.
There might be a caching issue on your browser. So make sure you clean your browser’s cache first if you see the old domain.
We could load it in another browser. Everything looks great and we can even log in with the same credentials.
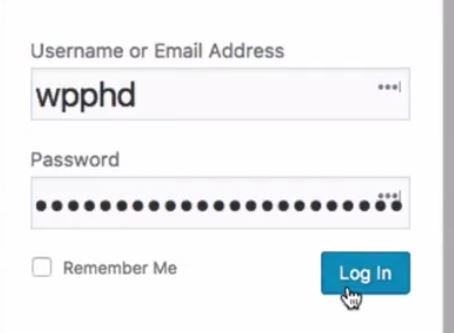
So I got my login credentials and these would be the exact same login credentials that you used previously in your previous domain. Everything is the same except for the domain name. It is now changed. So you’ve moved your whole site, all the content.
Broken pages on your WordPres site after migration
There’s one thing you might encounter which I encounter sometimes. It might happen if I go to a different page and if you go to View a page it might show as broken.
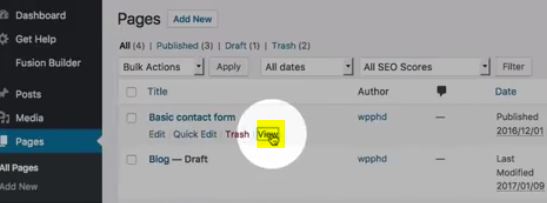
It didn’t show it there either. But it might show that that page couldn’t be found the server.
What you do to fix that is if you pick the pages that did that like clicking the checkbox and you click on Bulk Actions and then Edit, click on Apply, change the status to Draft, and then Update.

And then immediately select those same pages again, choose Edit, click on Apply, change the status to Published. And even though all your permalinks are transferred and they’re all the same there’s still in the database some hiccups sometimes that happen.
As you saw in my case, it didn’t happen. But I have seen it happen in the past and the way to fix if you have that happen, if you have that error appear which is this ‘Resource can’t be found’ error, you just change all the pages status of the ones that show that error to Draft and then change it back to Published. That solves the problem. Again, that’s due to the permalinks and the problem is easily solved.
So in this tutorial we learned how to move a website from one domain name to another while keeping everything the same except for the domain name.
Contents are the same, databases are the same, plugins are the same, settings are the same, the permalinks are the same and that’s how quick and easy it can be done. I hope this article helps